Honours Project
Project Zoe
A short Sci-Fi film set in the future where virtual reality has progressed massively. The story follows a young girl, Zoe, who was involved in a horrible accident resulting in both of her legs being amputated. She wins a state of the art VR set and we follow her through the rabbit hole into her adventures.
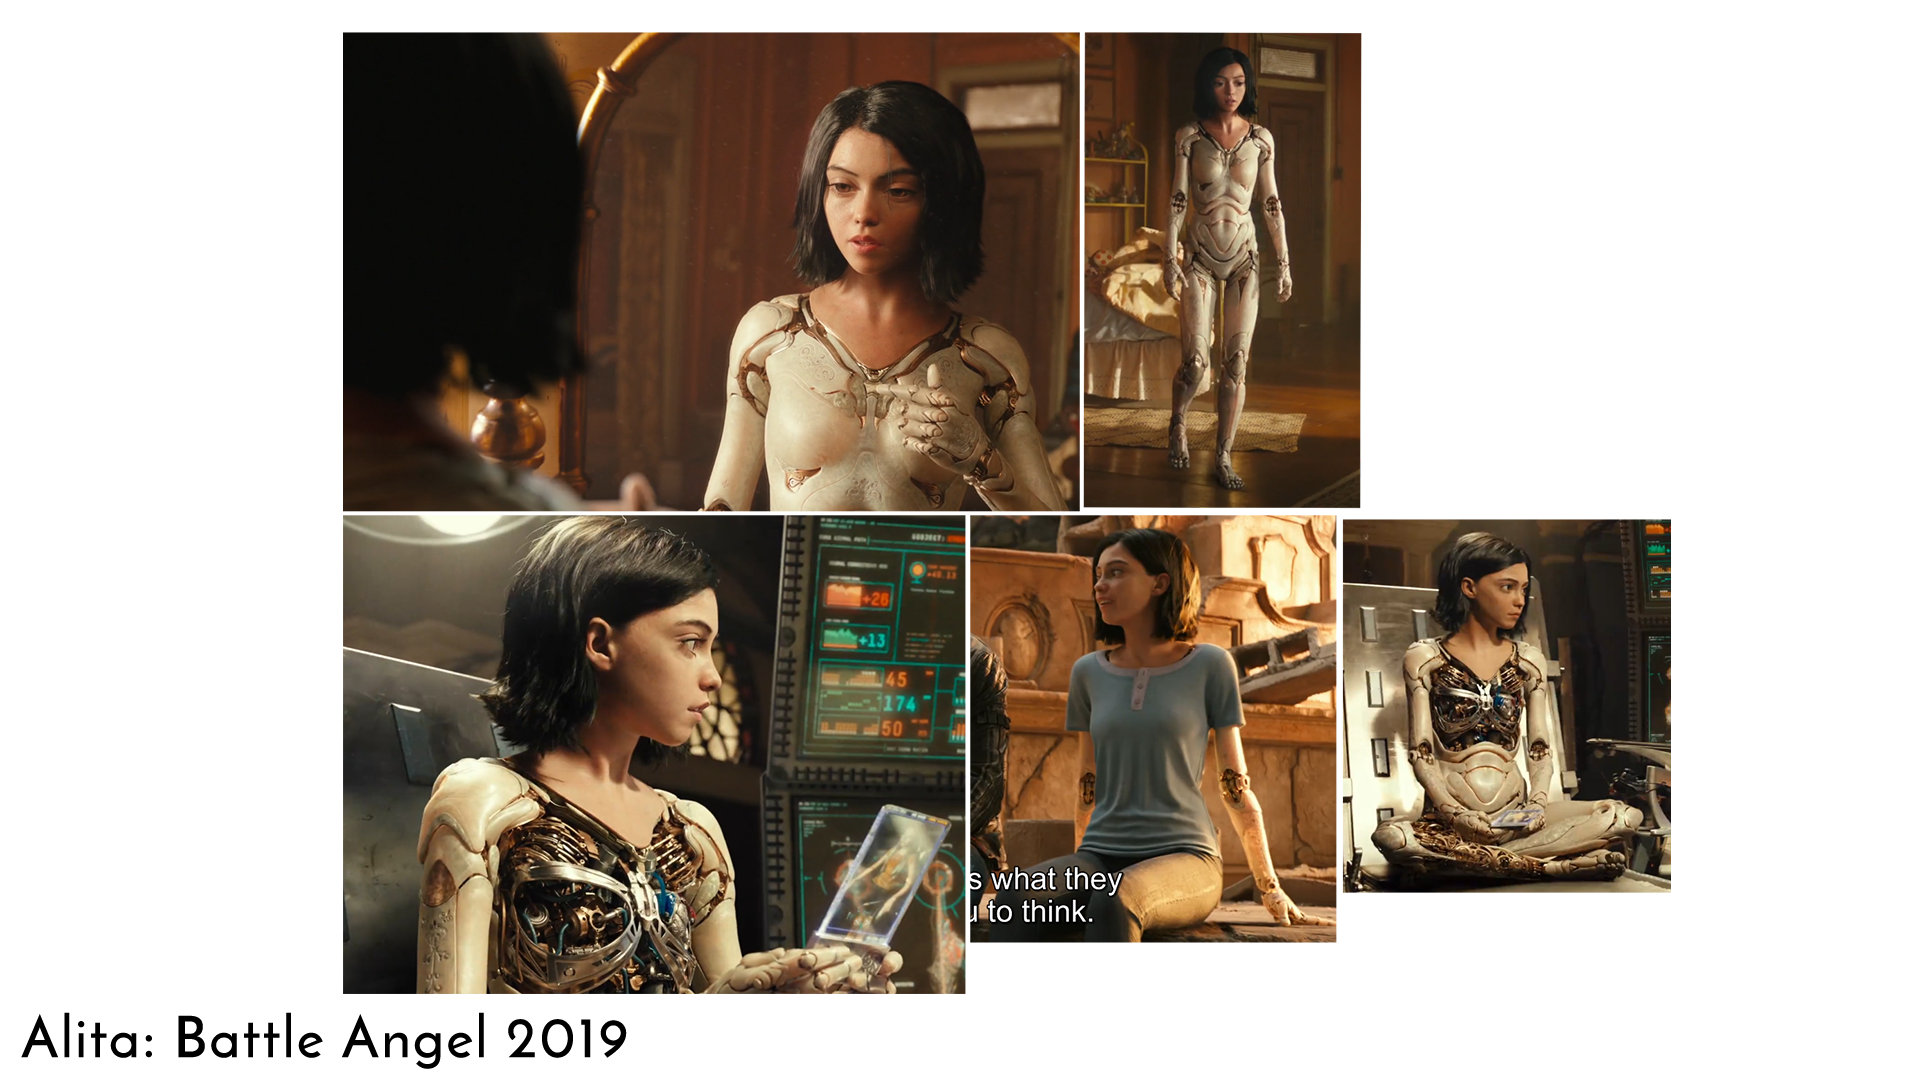
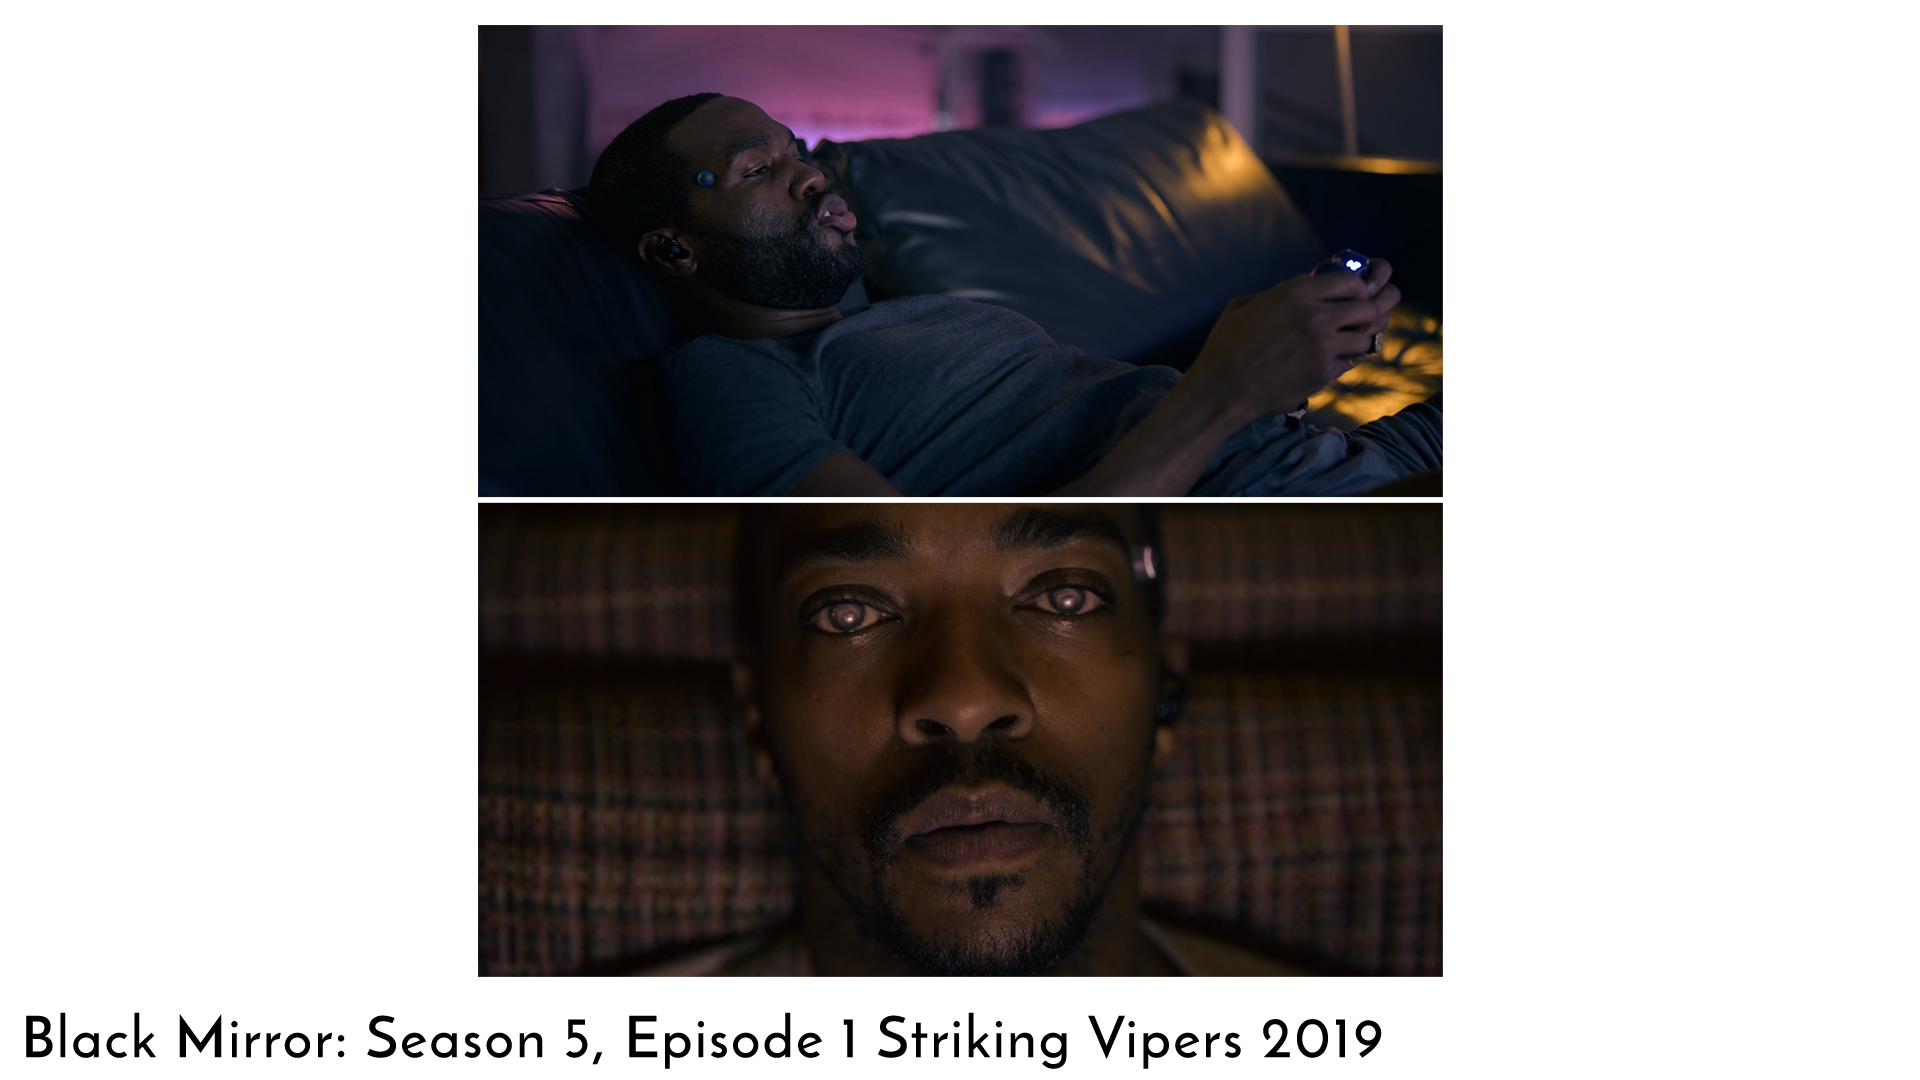

The look and feel of this project is massive impressed from some of my favoite movies and books.
Story
Zoe is 14 years old and she is a double leg amputee. She struggles making friends as she doesn’t get out much. Her mobility is heavily restricted because her family is only able to afford the most basic prosthetic legs which cause her pain to use. As a result of her staying inside all the time she watches a lot of movies and play video games on her laptop. Zoe uses online video games to make friends and she regularly gets lost in old adventure movies which she dreams of becoming the adventurer.
ShutterJack Technologies have recently announced a bleeding edge virtual reality system that connects directly to the brain. Using a series of technologies that suppresses and connect the brains sensory systems and spinal cord, the cerebellum connection and suppression system.
The company is offering a select few lucky individuals to win the C2S2 VR System. Of course, Zoe was one of the winners.
Upon entering the simulation she lands in a virtual bedroom which resembles her own but more fantastic! Still sitting in her chair she looks down to see where her basic grey prosthetic legs were but to her surprise she has two brand new state of the art hydraulic controlled power legs.
Standing up she almost goes off balance because she can feel the power behind them. To her right is a full body. Looking up and down her body she mutters under her breath “Pretty cool…”
She walks over to her bedroom door. Zoe has to squint her eyes while opening because the light coming from behind the door is so bright.
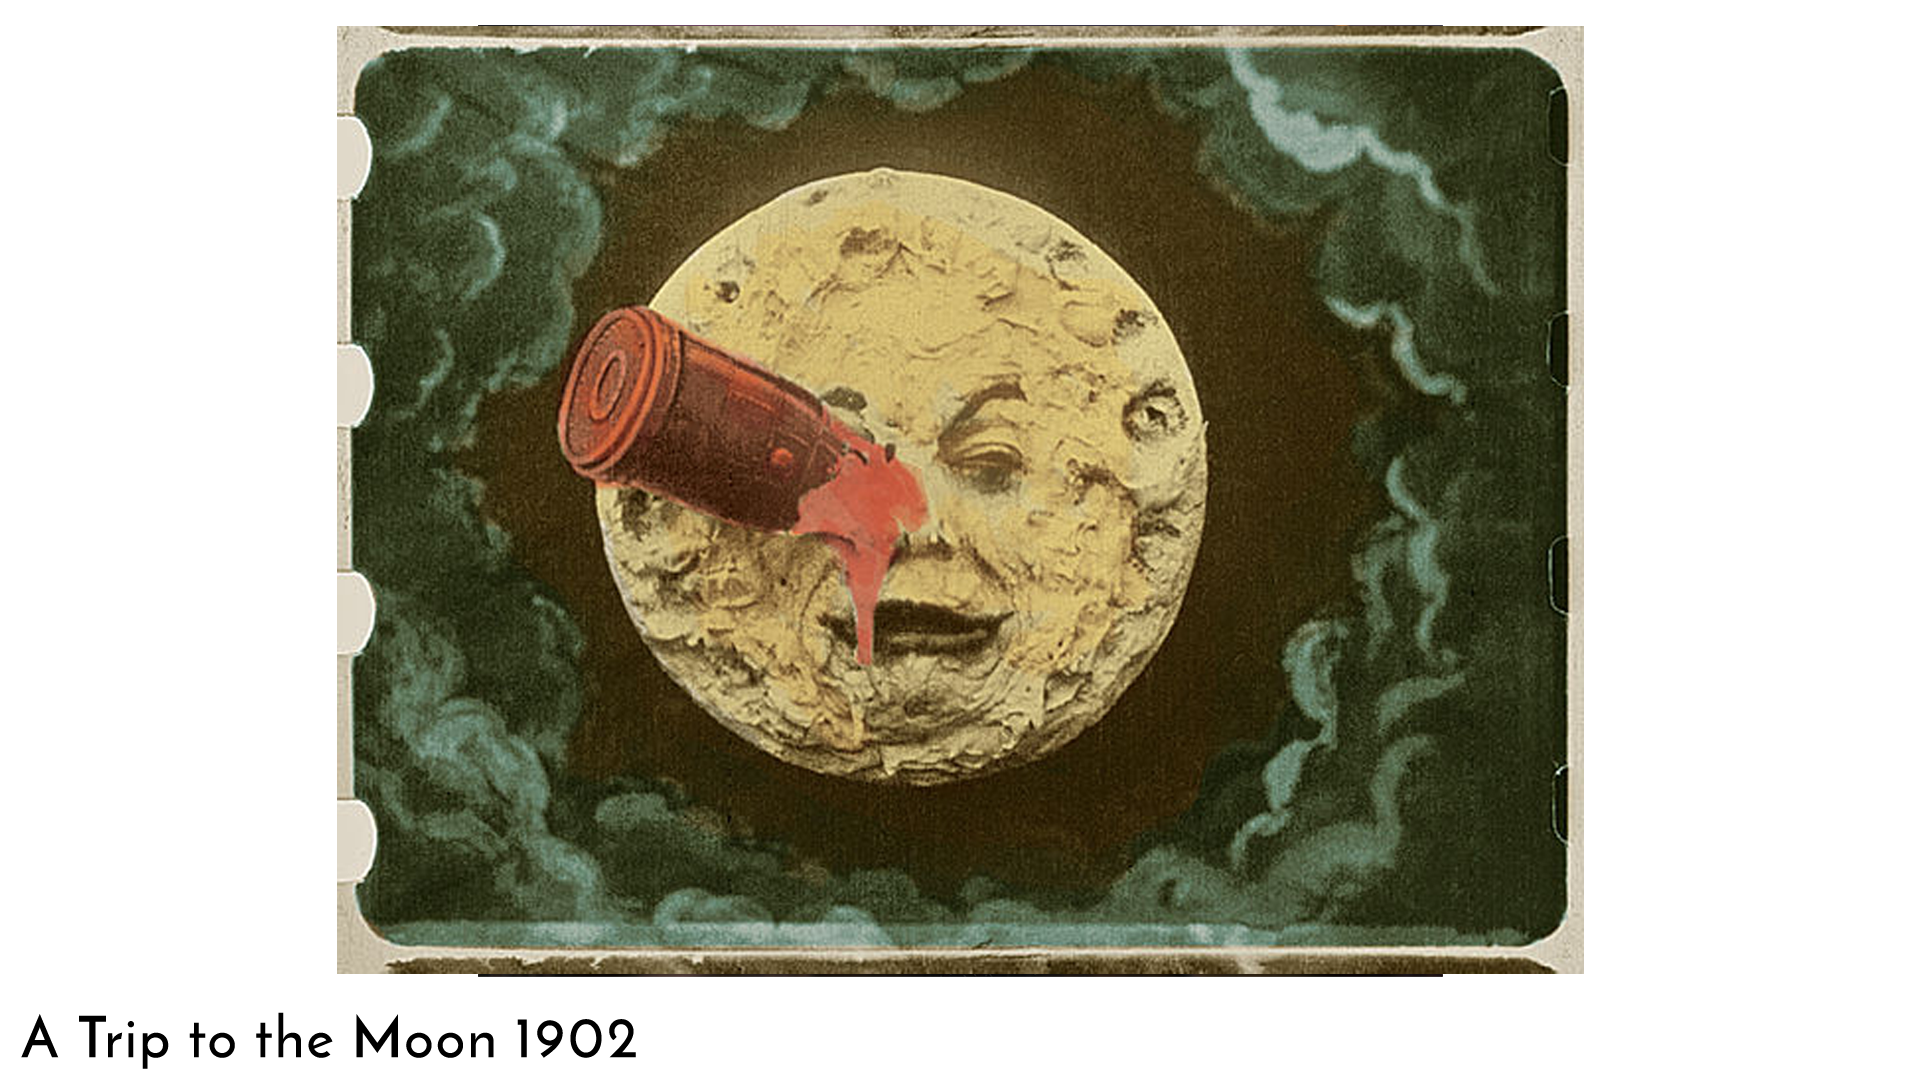
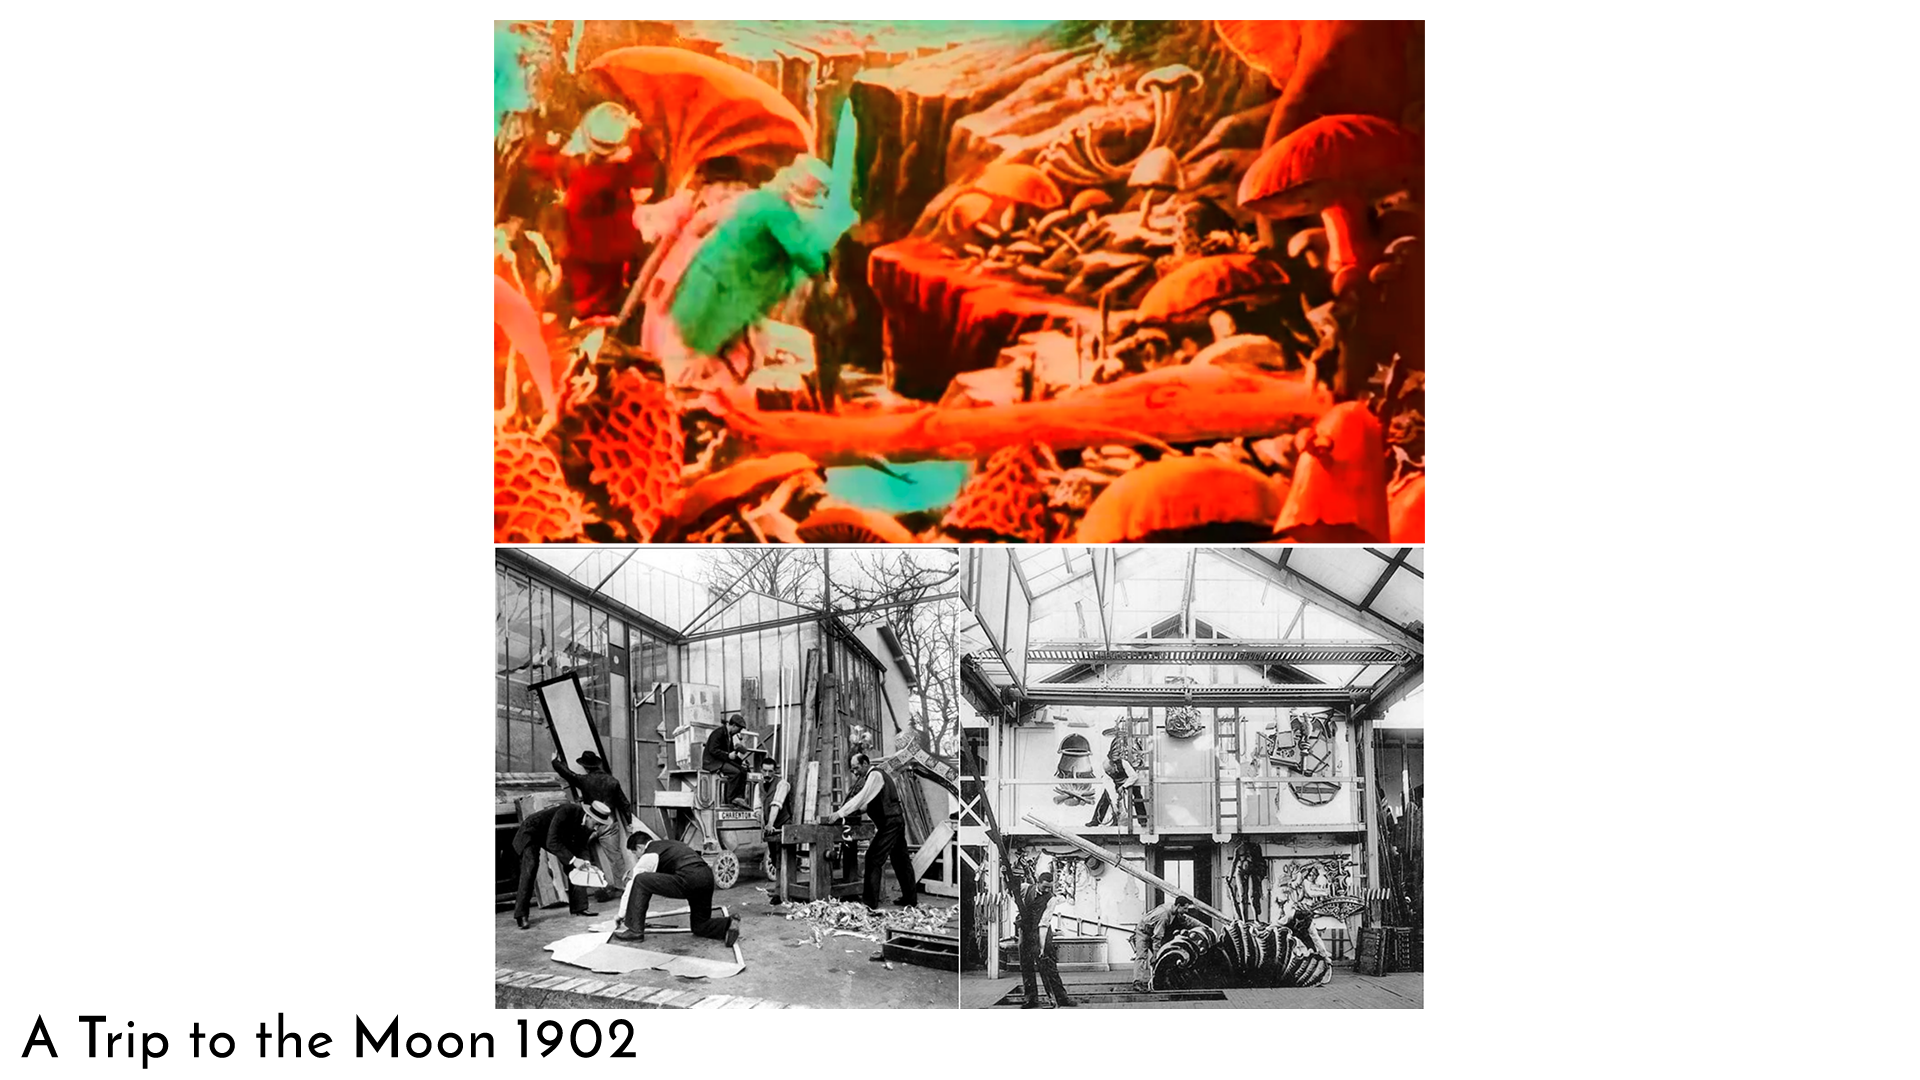
Slowly walking through the door, she recalls the location she is in. The green house film set of her favourite film maker. It’s as if everyone had just up and left mid shoot of the construction scene in A Trip to the Moon. The painted set pieces in the background and all the props where they should be and the tripod where the camera films from. After a while she panics and rapidly takes off the device.
End
SCENE 1
INT. ZOE’S BED ROOM – DAY
The bedroom is cluttered. Pastel pink walls, a notepad open along with pens and pencils strewn across the desk. A pair of crutches lent up against an empty chair.
A young girl is sitting at her desk. Her hair is messy and she’s wearing casual shorts and a oversized t-shirt. The legs that are inside the shorts are not her own: they’re fully prosthetic. No flesh is seen; just a carbon fibre like material with metal hinges and a stylish pair of trainers.
There is a small black box sitting on the desk. ZOE lifts the lid off the box and picks up two button shaped silver disks which she proceeds to place on each temple. They both begin to glow and her eyes roll back into her head and her body goes limp as she is transported into the VR land.
SCENE 2
INT. ZOE’S VIRTUAL BEDROOM – DAY
ZOE is still sat on her bed as if nothing had changed but her room seems a little different. Everything looks a bit washed out and almost dreamy. The ceiling and the windows are tall, and the light coming in from them is extreme. Her desk is still there with all the clutter but something seems very different. As she looks down at her legs its clear she’s had an upgrade. Brand new robotic legs which she can move and twist just like real legs.
While trying to stand ZOE almost goes off balance.
In front of her is a full-length body mirror in which she checks herself out in. It is clear from her reflection that not only that her legs have been upgraded but the lower half of her body is robotic.
While looking at herself in the mirror and testing her new legs she notices a throbbing light emerging from the border of her bedroom door..
Zoe steps towards the door, slowly opens it and walks through.
SCENE 3
INT. MUSHROOM CAVE – NIGHT
She is in a whole new world.
Zoe walks from her old bedroom though a free standing magical door into a magical mushroom cave straight of a scene from her favourite film, Le Voyage dans la Lune.
As she looks around in wonder it's obvious that the pathway leading to the light is drawing her in.
Without even thinking her feet begin taking steps towards the light, past the giant glowing mushroom, and along the log bridge to the other island.
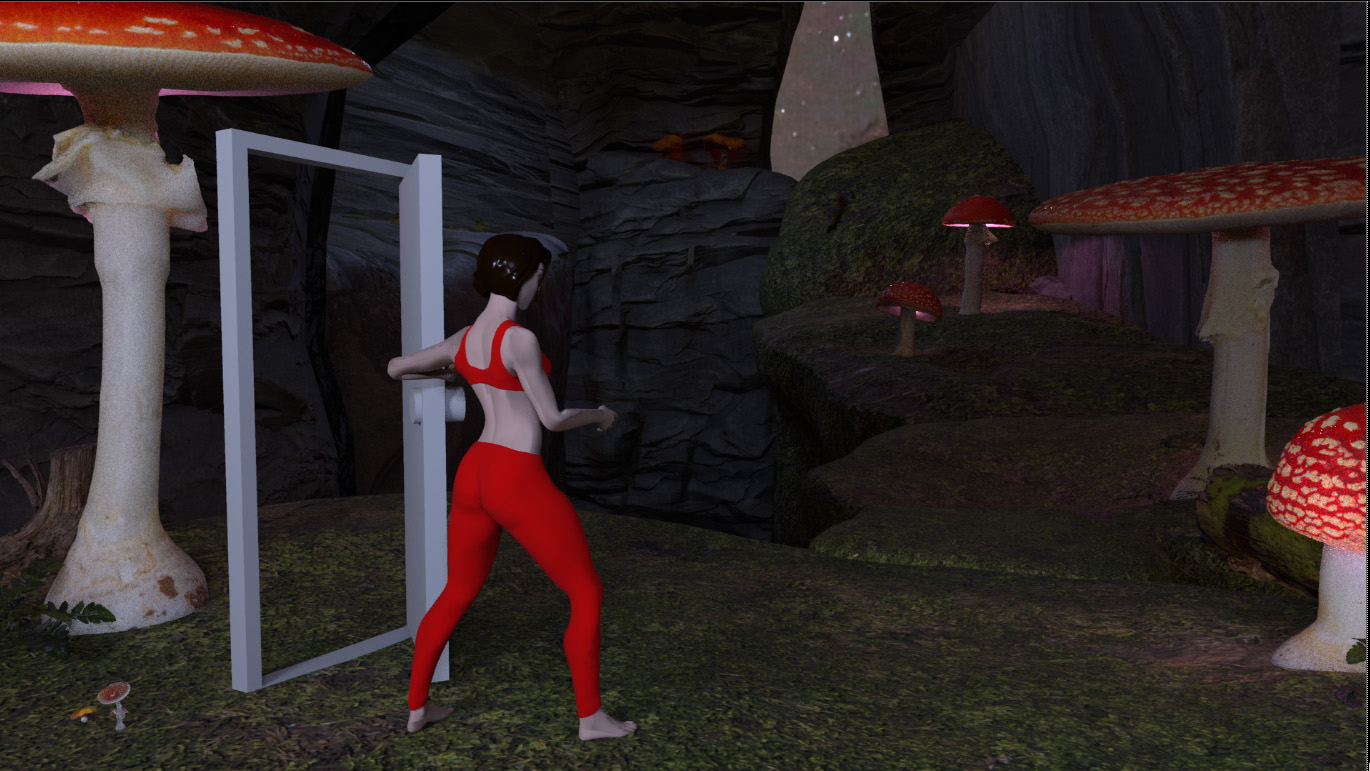
Previsualization of the layout, using stand in character.
Lets Start Production.
This is quite a large project for just one person. I have decided to focus on the final scene, where Zoe walks from her bedroom into to the amazing new land for the first time. Keeping organised is going to be imperative so I have created a orginisation spreadsheet in Exel that mimicks some of the features in shotgun.
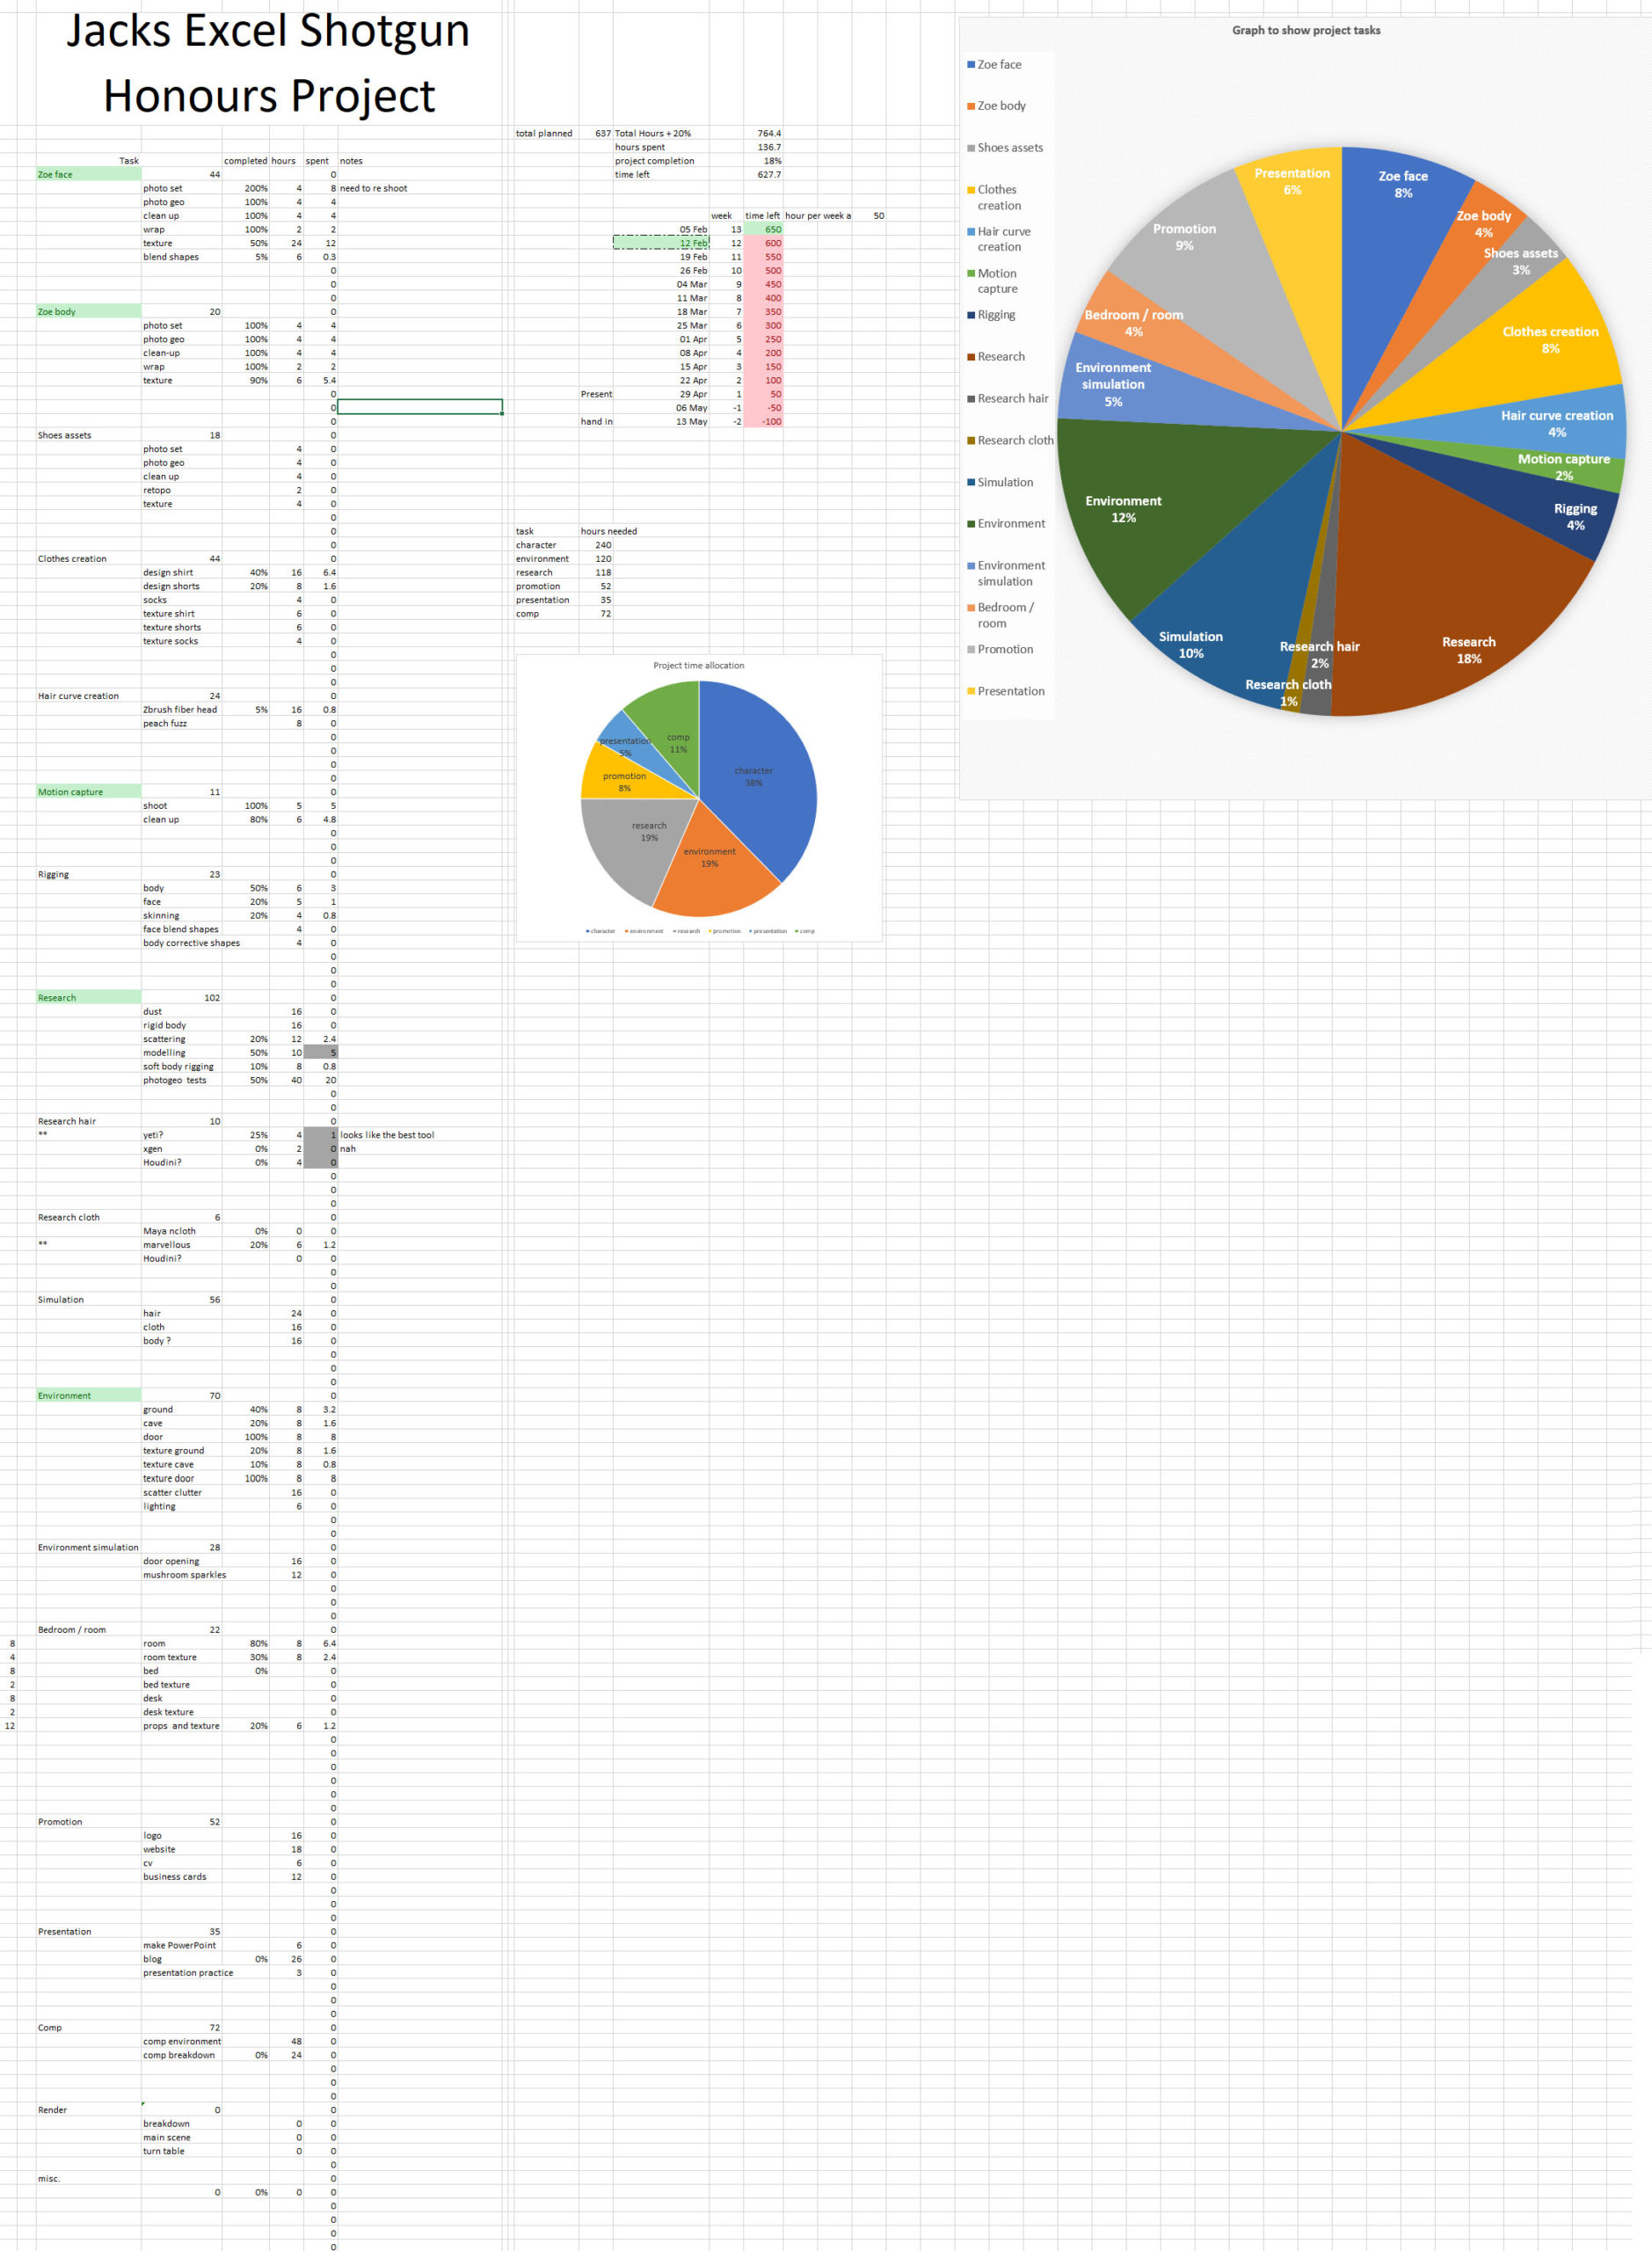
Excel Shotgun
The spreadsheet works as an advanced todo list and time managment tool. I progreammed a timeline feature that knows how many weeks I have untill deadline. The pie charts also live update along with the hours completed and hours left. I can add tasked an aclocate an estimanted time that it will take to complete each task and the time line will tell me how many hours I will need to work per week to complete the whole project on time.
The total hours section has a 20% overtime allowance just incase it takes extra time as it inevitably will.
Open to view Excel Shotgun
Motion Capture and Character Scan
I used lots of the skills I have developed from working with children actors in the past with Zylo Performance where I would direct children from the ages of 7 to 15 for specific visual effect scenes. As well working with Realtime UK gave me some important knowledge of clean up and direction. started with each beat of the story first I would perform it and get Zoe to copy after, then give any notes while she was acting. I would build up the scene beat by beat until we had the full scene. I found this technique to work well even though it takes a lot longer to build up the scene.
We had the whole day to film the two scenes and perform the character photogrammetry scan so I had the luxury of time. Overhaul I captured 36 data sets which included all takes of the both scenes and multiple extra sets like walking, poses and some of her gymnastic routines. I chose to clean up only 9 of them which can be used in production as well as rig testing and look development / breakdown material which can be seen in videos along with a time lapse of our day.
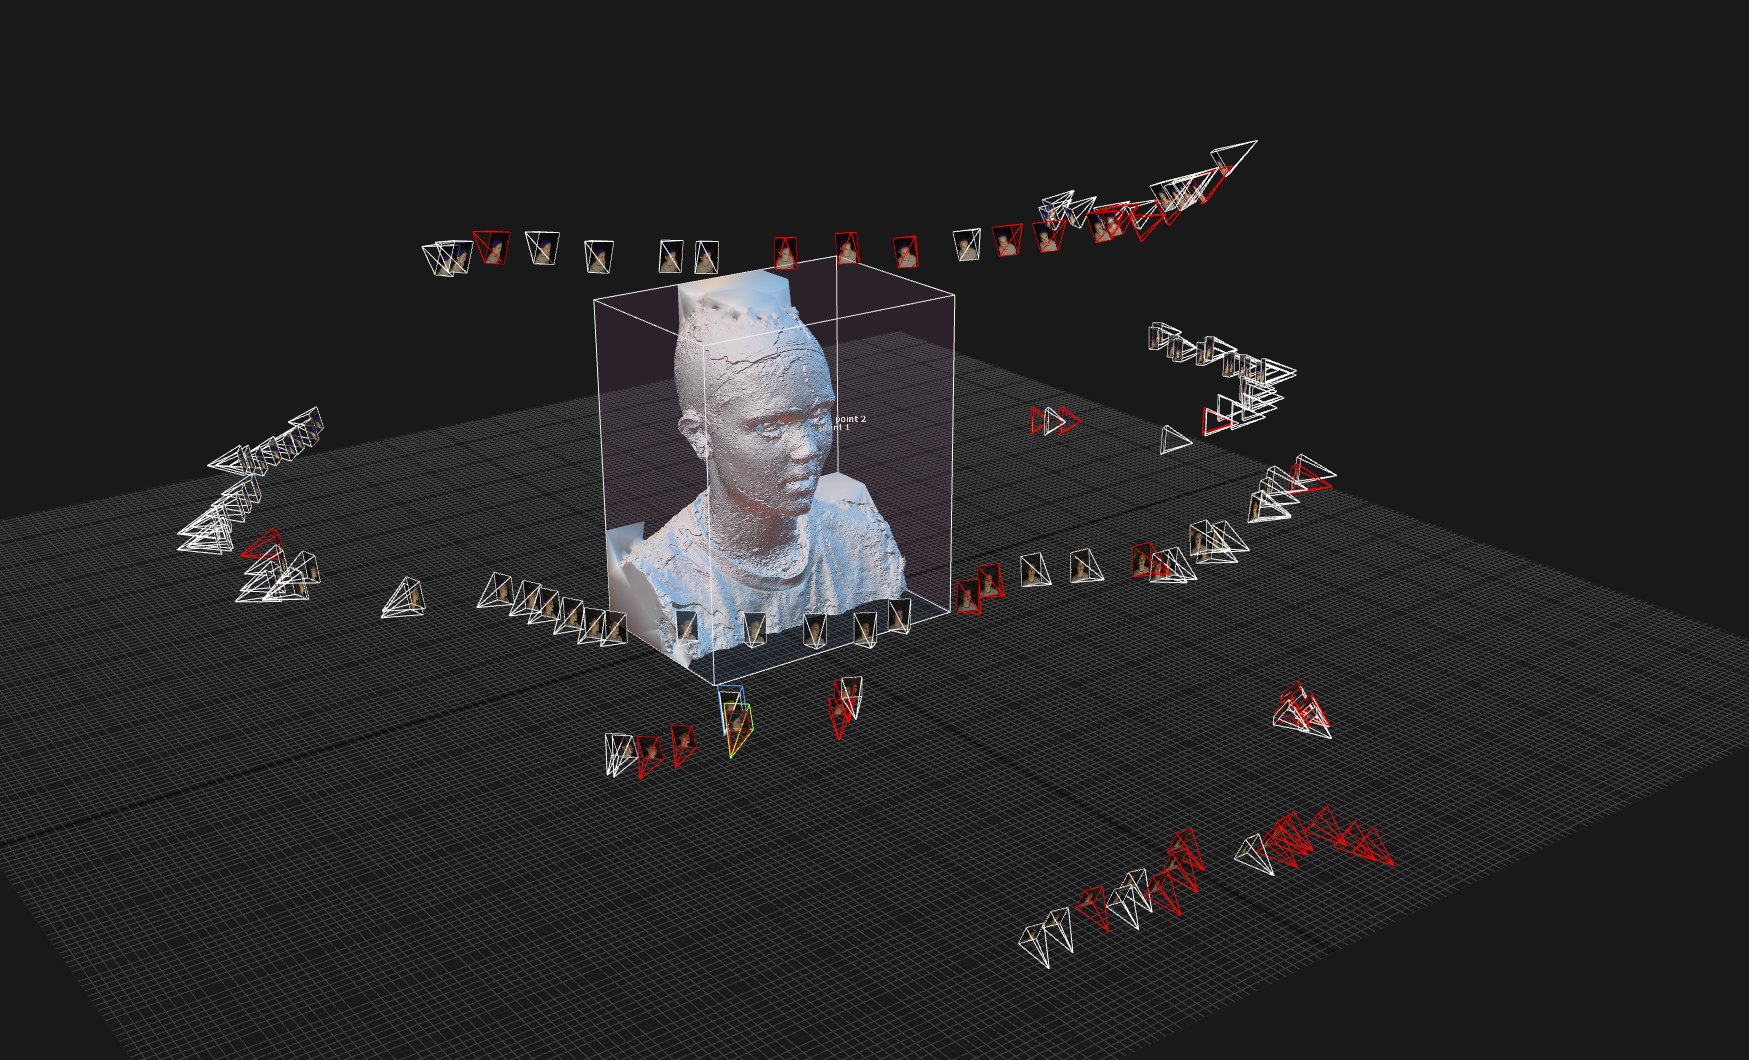
Character Photogrammetry Scan.
This was a very important step. I captured the photos that would later help me build the face and be used as reference for the body. I had been studying photogrammetry for the last three years with hundreds of hours of research and development and refining my skills developing tips and tricks for the mesh to be as clean and noise free as possible. When I visited Ten24, I had learnt a lot about the proses of clean up and most importantly how important it is to extract detail from the texture maps. James Busby from Ten24 emphasised this point in an interview on the Art Heroes podcast on 12th March 2020 where he said, “The skill in cleaning scans is extracting detail from the texture maps”. This has been a reminder to me throughout the process to how important the texture maps are. Therefore, the lighting is so important when capturing the photo set.
After reviewing the photo set from the day with Zoe I was somewhat disappointed. I had made the mistake of not having enough light on the shoot. Even though I set up three soft lights I had to compensate with the shutter speed and iris to expose correctly. This resulted in motion blur and depth of field blur. The motion blur was more survive as I had to move quickly because Zoe was moving very small amounts such as breathing and other unintentional movements that is unavoidable.
I tried solving the mesh and projecting the textures, but the map was just too blurry. This is a result of the motion blur in the photos and the length of time it took got capture all the photos for the pose. I decided to organise another shoot with Zoe and capture just her face photogrammetry again. I realise this is not always possible to organise a reshoot with the actor. If I could shoot with the actor again, I would have been able to proceed but it would have taking a lot longer to texture. I would have had to do a lot more manual projection in a tool like Mari or substance painter. After using might bright lights and faster shutter speeds I was able to get a better quality result. I used flash with a very bright LED panel close to Zoe’s face and moved the light around.
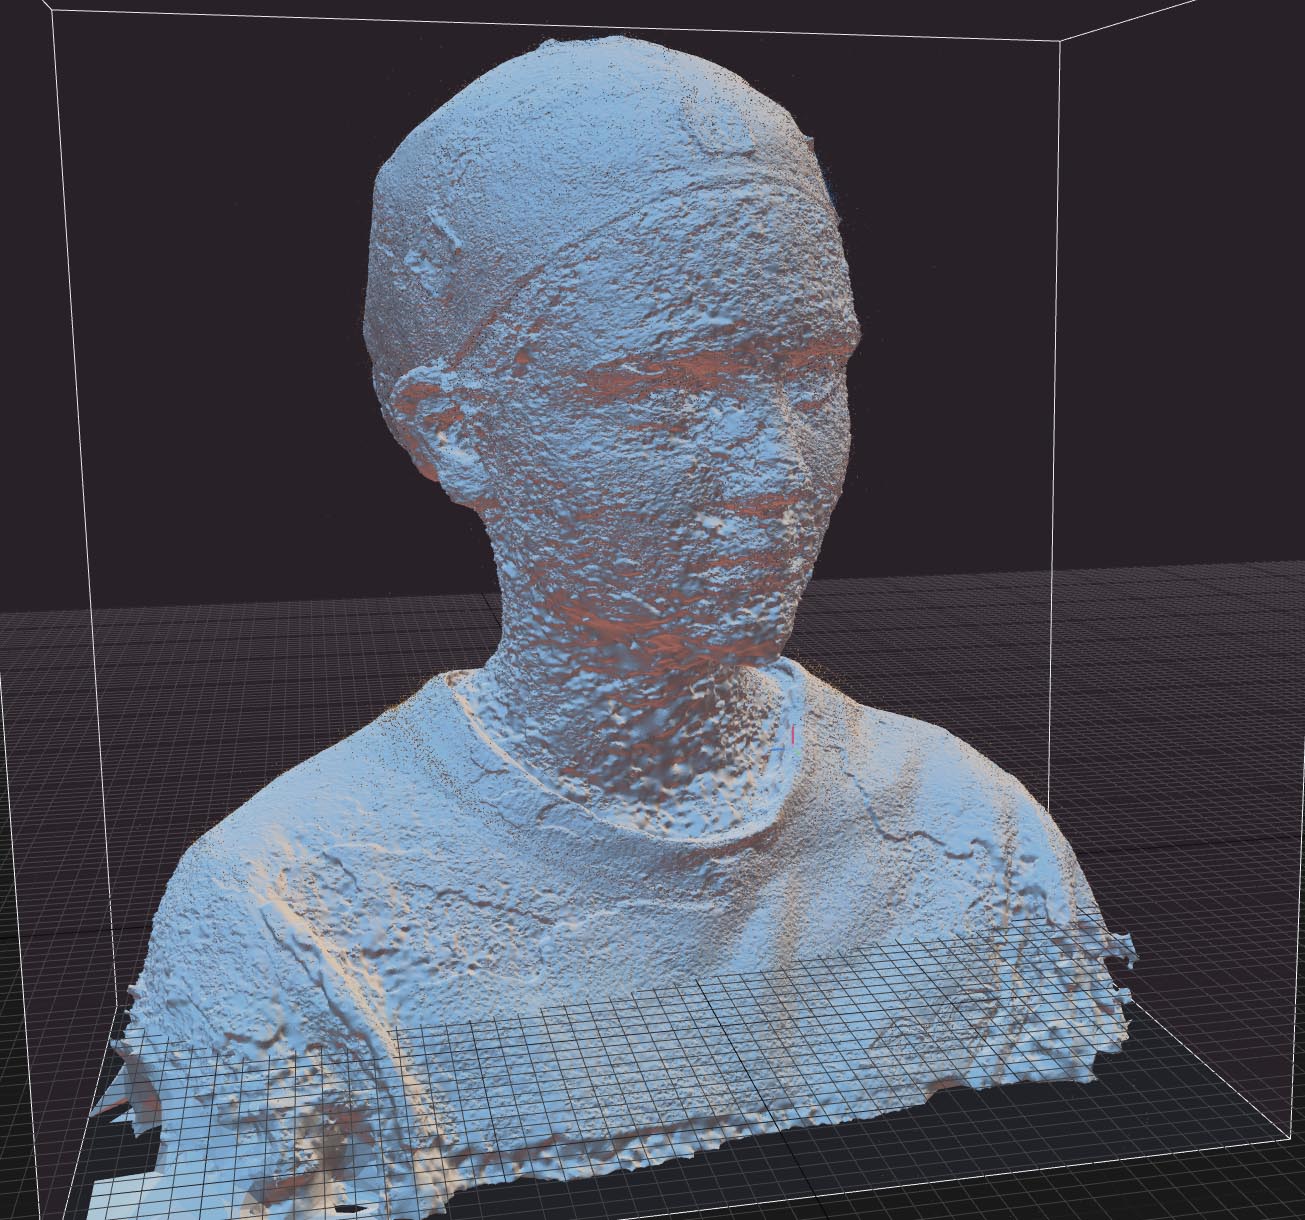
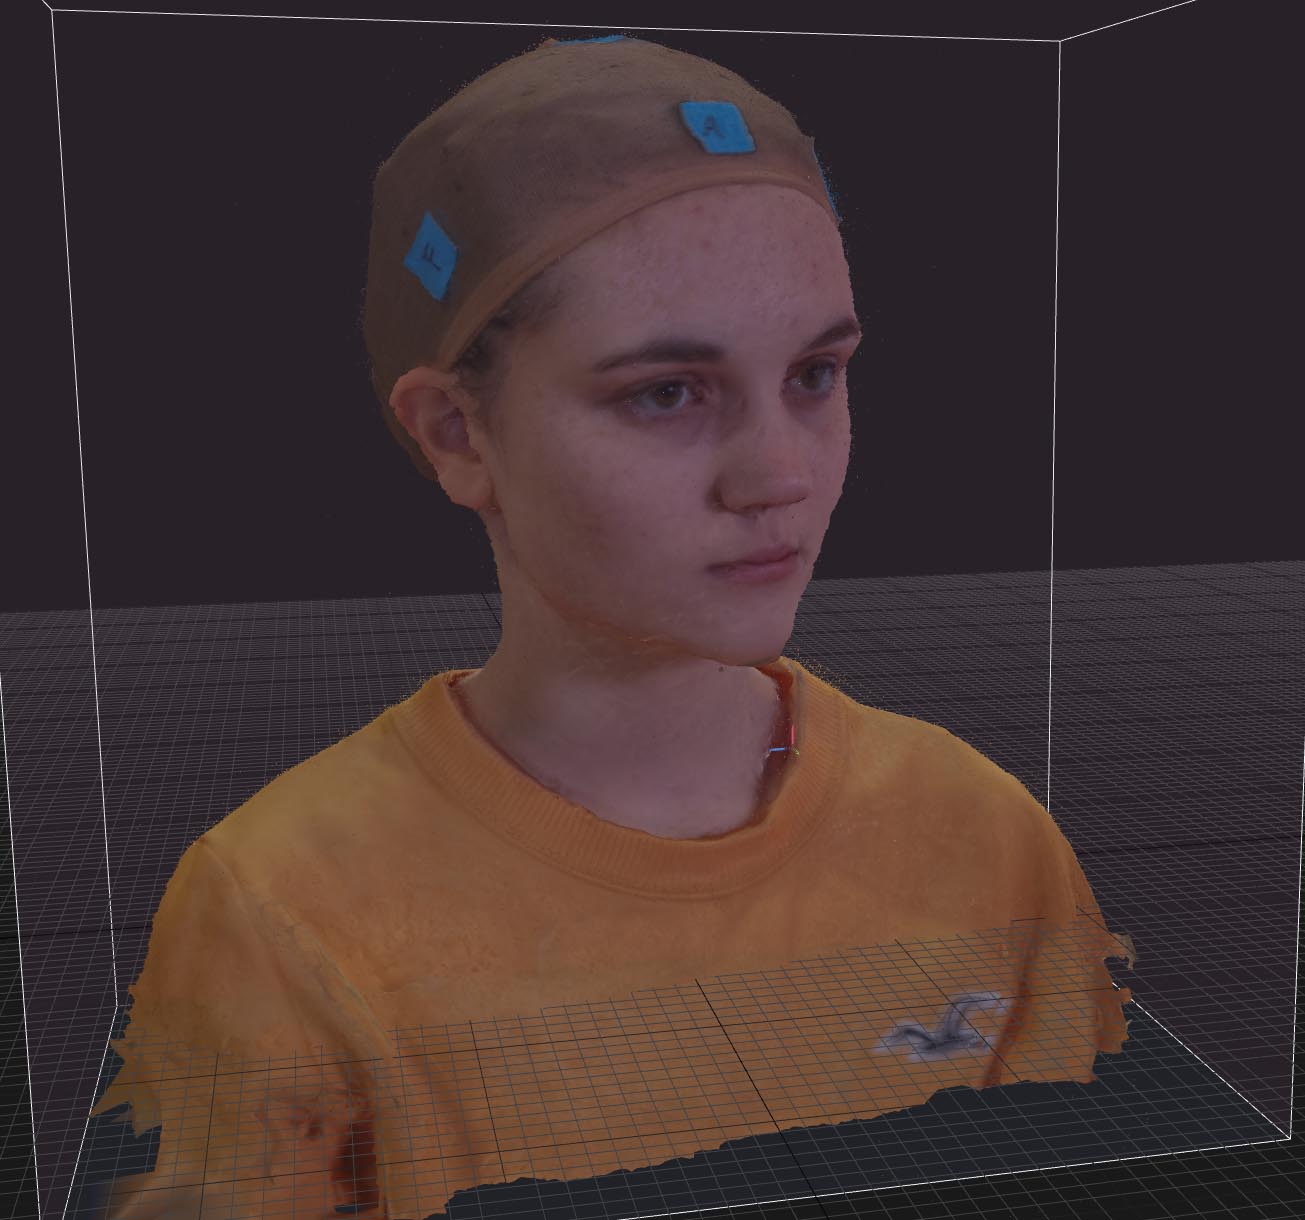
The image on the left shows the first method that was taking on the same day at the motion capture. See above for lighting set up. The image on the right shows my new method where I move the LED panel and flash guns round with the camera. As you can see there left shows a more noisy mesh with mush less detail overhaul . And the right shows more detail in both the geometry and texture map. Although there are some large artefacts on the forehead and jaw ling that look like cracks. This is most likely caused by Zoe moving slightly and Reality Capture trying its best to keep the parts together without causing much noise at all.
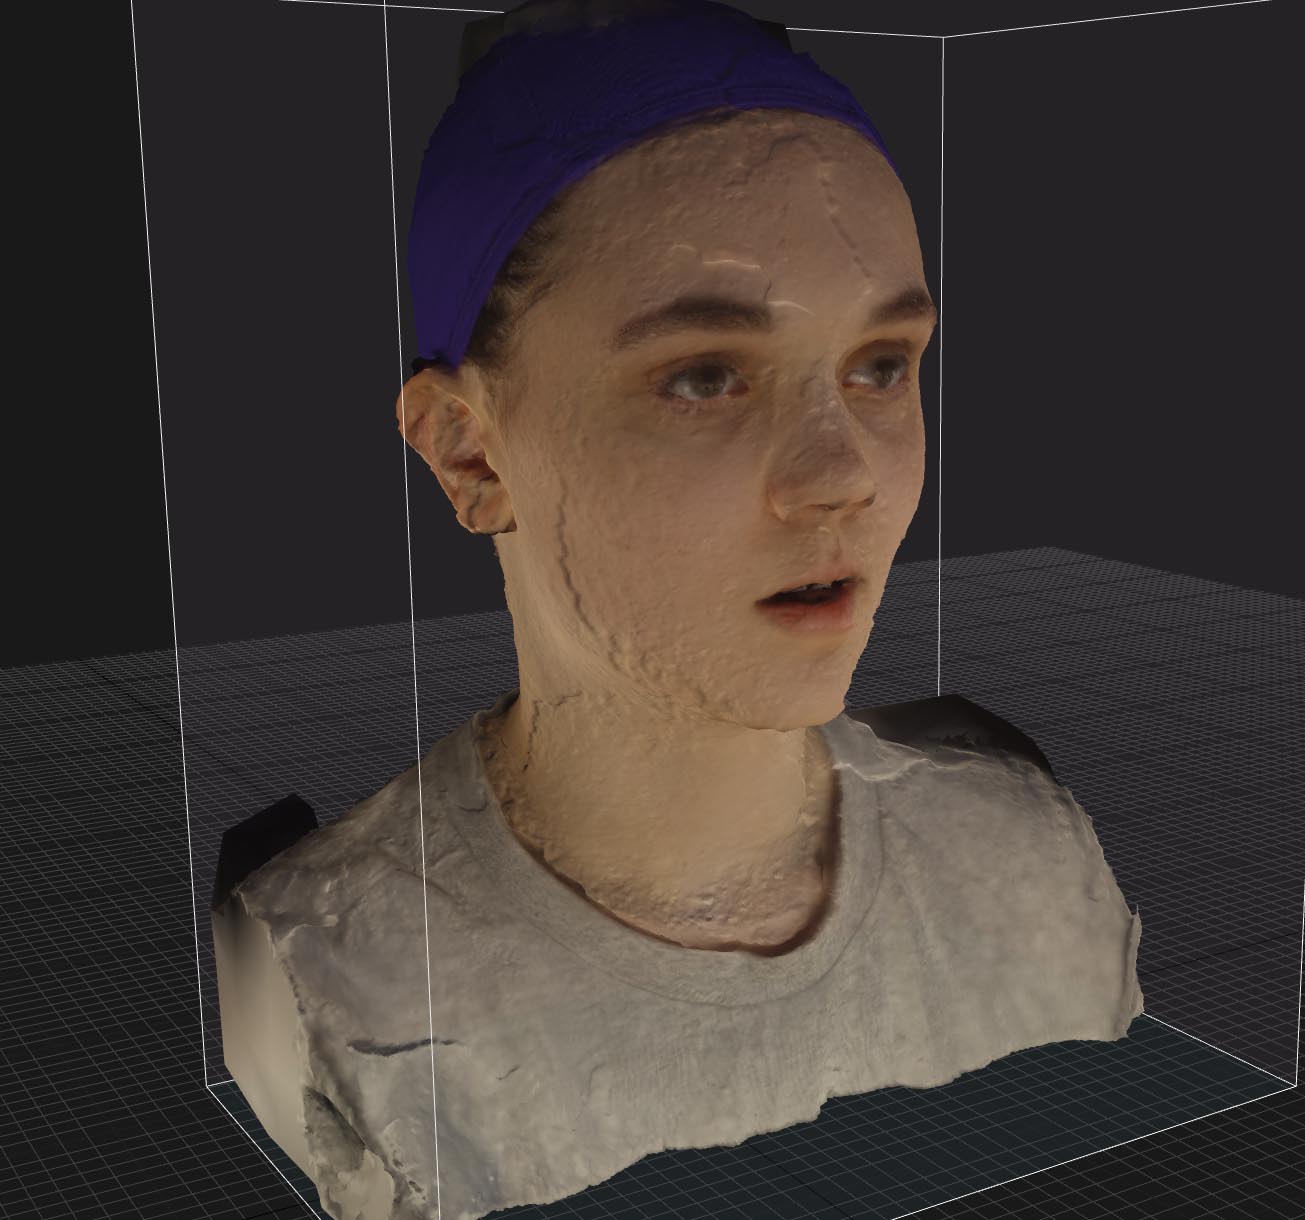
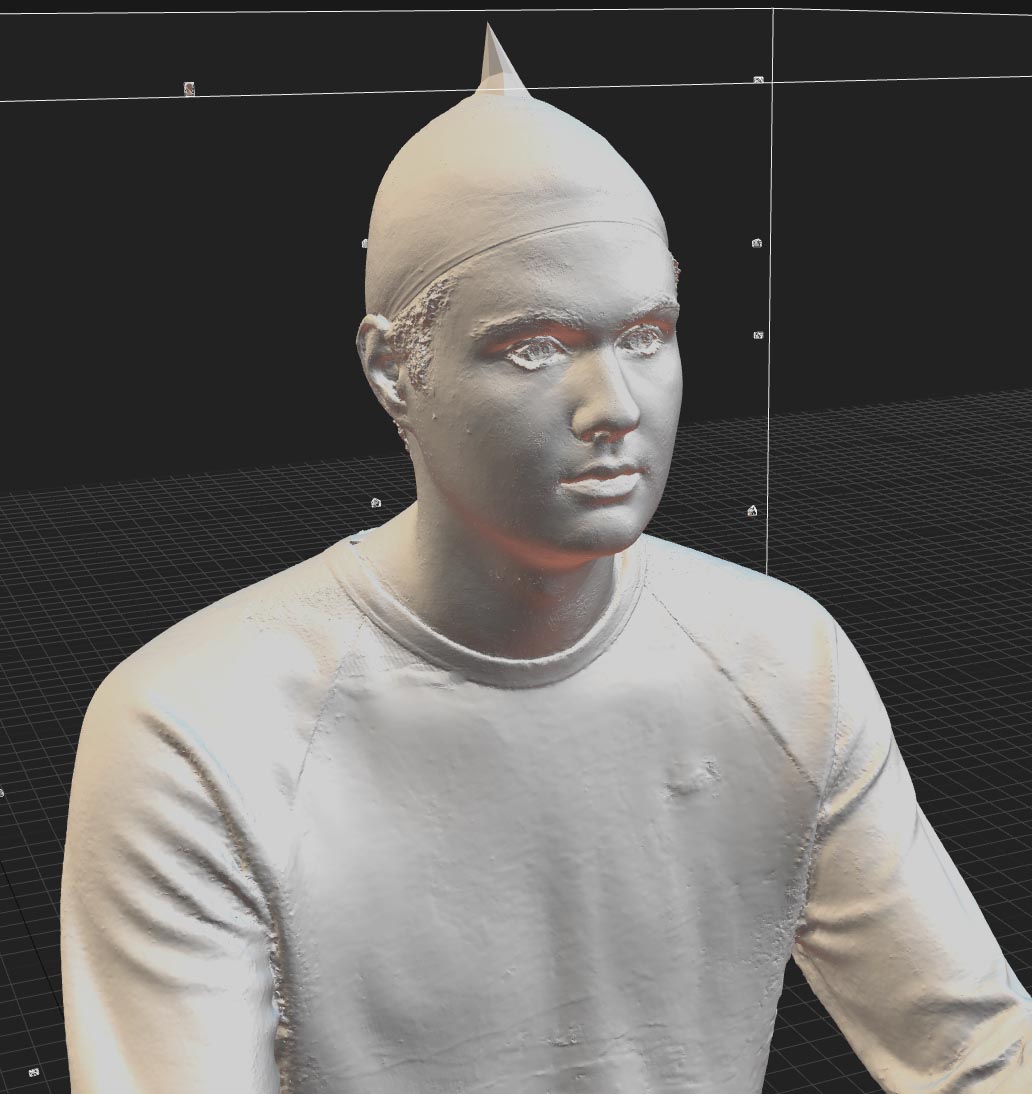
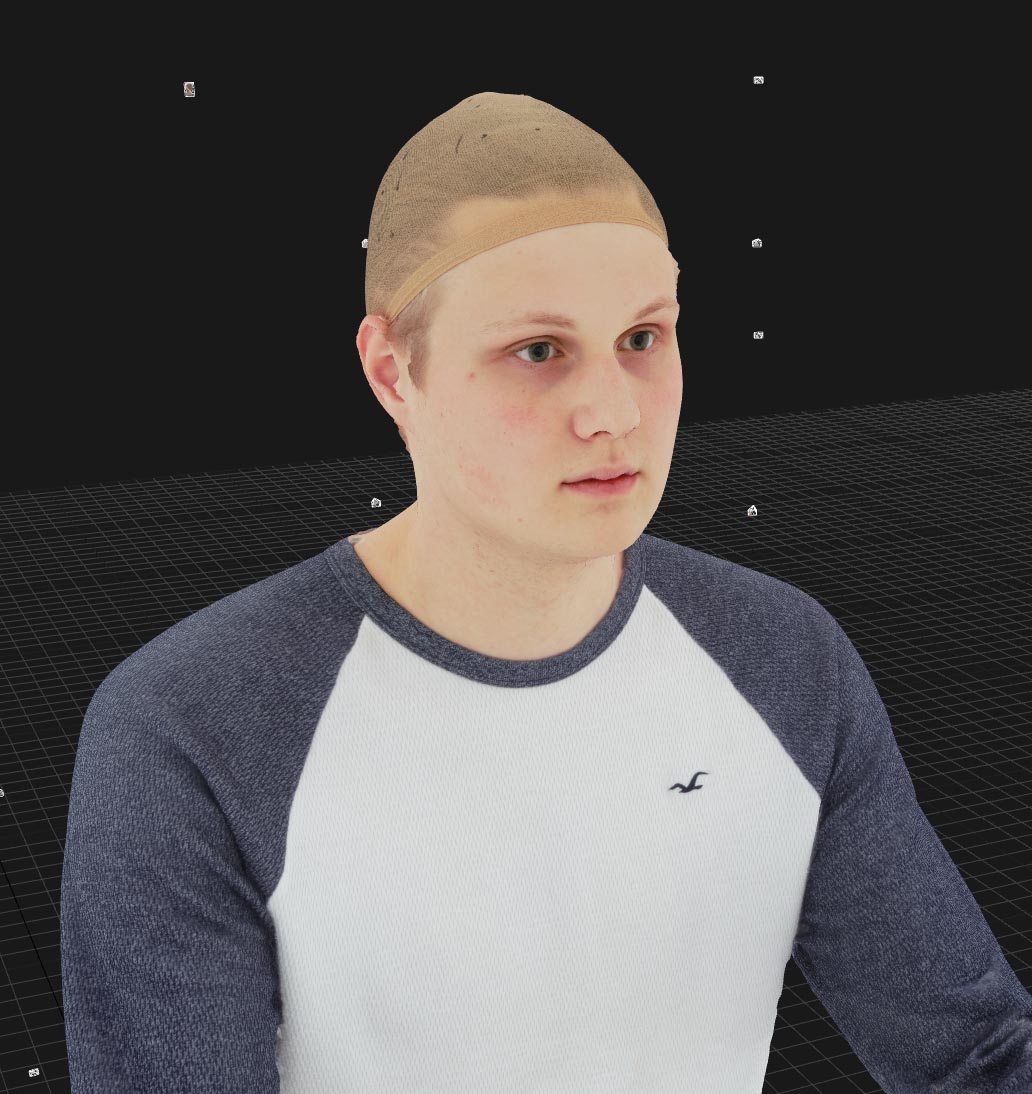
The single camera method can never compete to a multi camera simultaneous photo capture but it definitely quicker than modelling by hand in a package like Zbrush or Mudbox. I could try using two cameras and orbiting the actor for a faster scan time to improve results or I could improve the lighting setup by using a ring light this would allow even lighting of the subject minimising shadows to create a better unlit texture map.
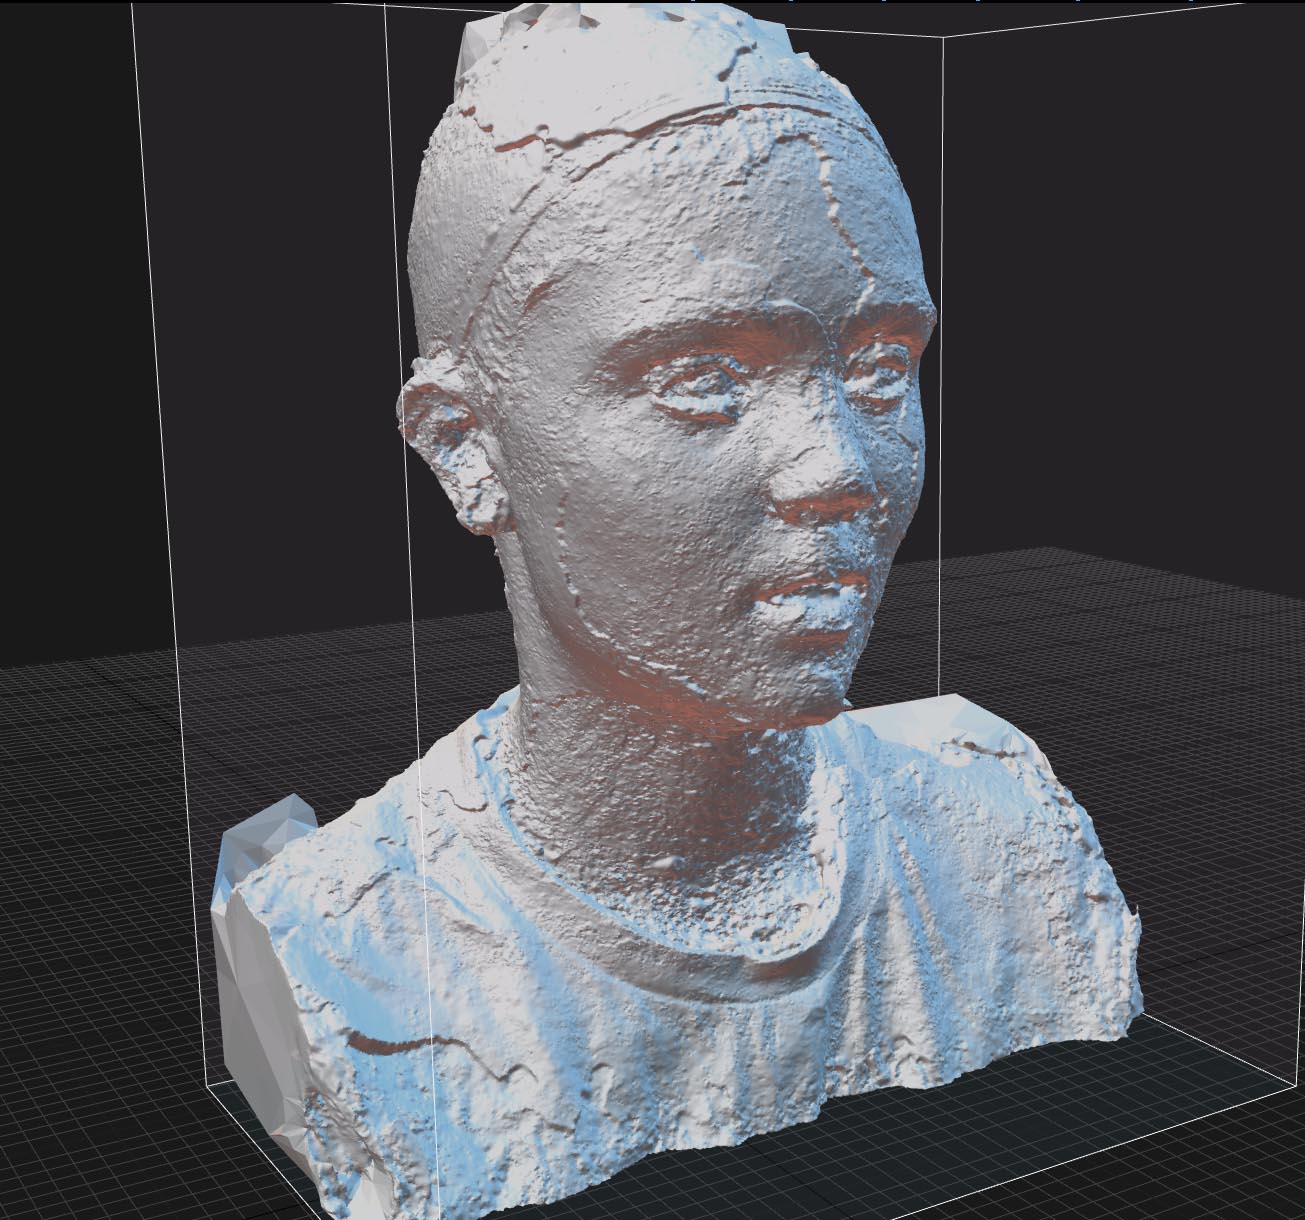
This is the quality I am aiming for. This is a scan that I used in my last project. It was scanned using Ten24’s 180 camera scanning rig. I am using this image as a quality benchmark as it was scanned using the same kit used for TV shows and video games. The scan shows pore detail in the raw geometry. The geometry is highly detailed.
I used the same pipeline and clean-up workflow that I developed for my last project. I had to add some more steps to create a higher level of realism of the model. I also had to clean up the body and head separately then merge them at the end.
I applied these steps for the head and then the body.
- Import images into Capturing Reality and align, set scale and centre point cloud.
- Create high poly mesh and low resolution texture map for reference later.
- Import into Zbrush to start the clean-up process.
- In Zbrush remove any parts of the mesh that aren’t wanted. Eg. floor, walls or any other floating geometry
- Smooth down any major spikes but do not change geometry too much as this will result in errors in the texture map. NOTE do not destroy the UV in the cleaning process as you won’t be able to use it as reference in wrap.
- Import the rough cleaned up model into Wrap3 by Russian 3D Scanner along with base mesh
- Match base mesh scale position and rotation to best fit the scan.
- Select polygons on base mesh which you don’t want to wrap e.g. mouth bag using the selectpoly node.
- Start making point pairs using the point pair node. Make pairs at key landmarks. Eg. eye corners, mouth corners, finger tips, etc. the more you have the more accurate the wrap will be but make sure your pairs are accurate.
- Then make sure you’re happy with the result if you need more point pairs then add them or use the brush to project further. The aim is to have the closest wrap possible to have a more accurate texture projection.
- Export the mesh with the exact name of the exported model from Reality Capture overwriting it.
- Import that model into Reality Capture and texture it with the highest settings.
- Export textured model from Reality Capture along with texture map.
- In Wrap 3 on the first wrap node before the subdivide apply any brush clean up like removing wig cap or any other smoothing.
- Apply a symmetrise to model this will make it easier to rig.
- Export the symmetrical model.
After I had completed these steps, I had two symmetrical models: the head and the body.
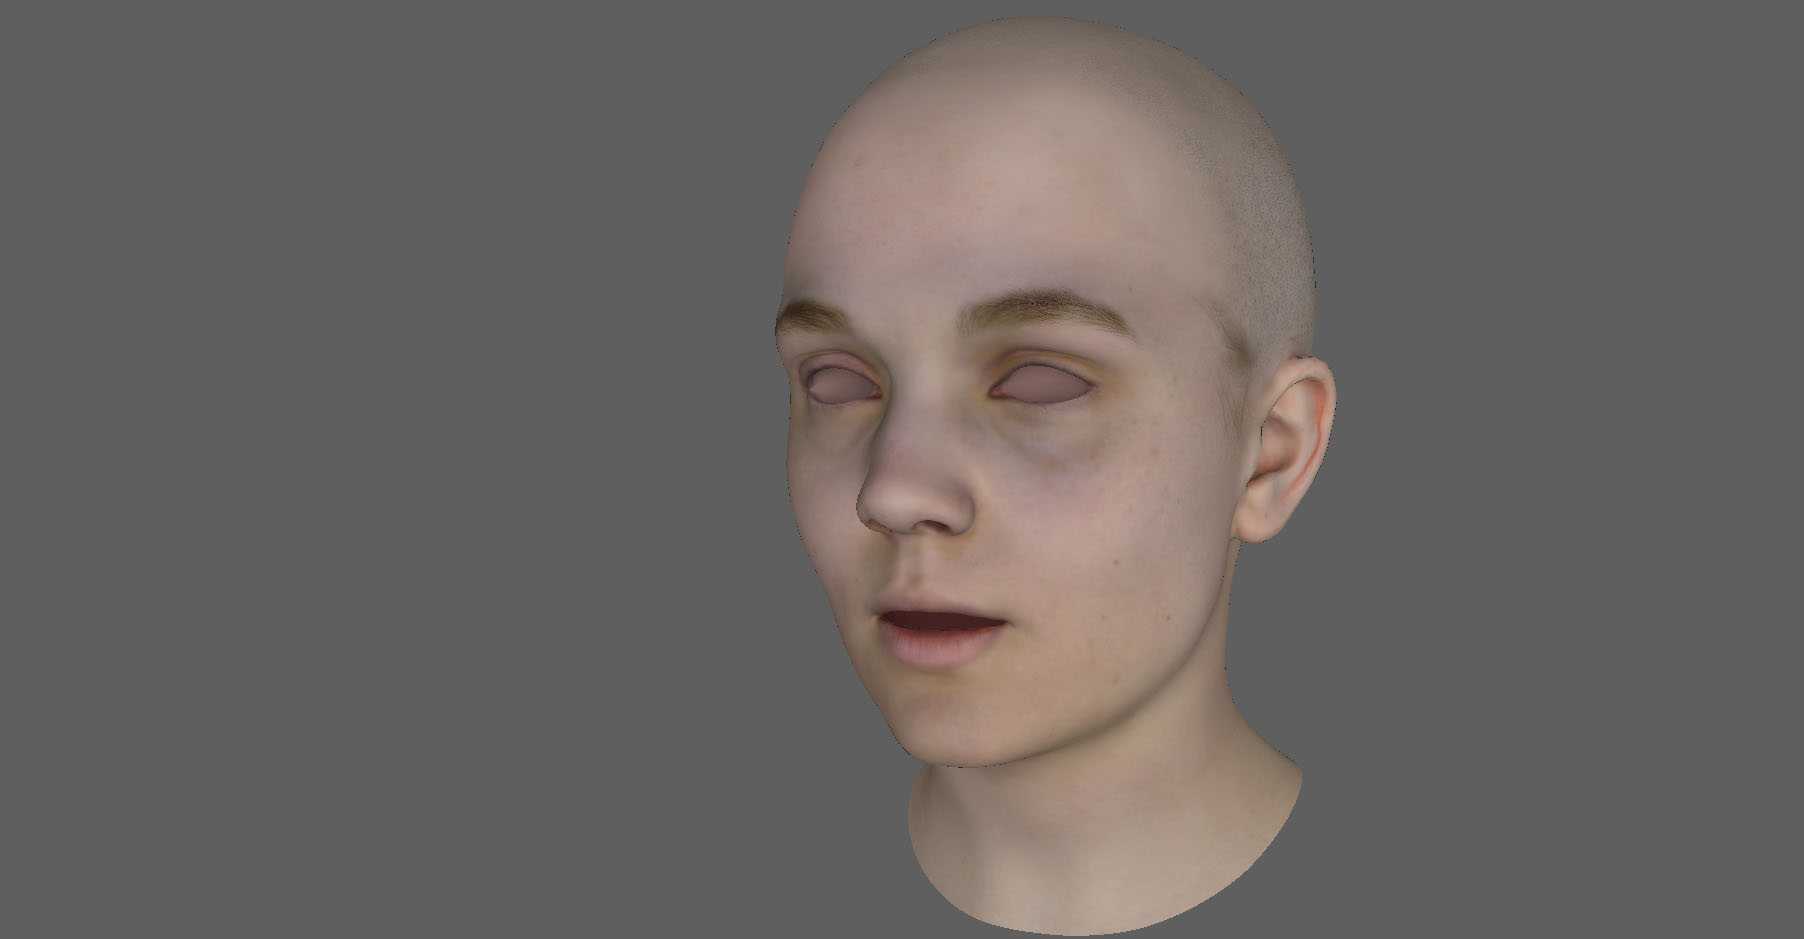
The body scan was very low quality mainly because of the clothing I had Zoe wearing. Her top was a shiny black skin tight top which is the worst possible thing I could have got her to wear. There were no features in her clothing that the software could pick up it was incredibly noisy and had lots of spiky geometry. I couldn’t use the scan geo at all. But her basic form was there so I could use that to sculpt and modify a base mesh from 3D Scan Store. This base mesh was great because it had UVs and a high quality diffuse map which used as a base for Zoe’s skin.
I used split up the base mesh UVs into my own UDIM layout and then I transplanted Zoe’s head onto the body I made for her. At this point the head texture still had the wig cap on as well as many projection errors so with the help from the base mesh texture map I cleaned the projected texture map up and replace the scalp with the 3D Scan Store texture. I then used some assets from TextureingXYZ for the eyes, and displacement for her skin.
I considered using a physical accurate simulation based rigging system instead of standard skin painting and blend shape. Ziva Dynamics is a soft body simulation plugin for Maya that allows the artist to add a bone, muscle, fat and skin system to a character allowing multiple layers of simulation. This not only makes the characters body move in a more realistic way but also eliminates the need for complex skin painting. The result can make a massive difference in the final look of the characters skin and face animation. The technique would require a human skeleton and muscle set up which can be very complex, requiring extensive knowledge of human anatomy. An alternative and possibly a more valuable skill to learn is the Houdini FEM workflow which would allow a more simple proses and unlocking knowledge of Houdini in general. Saying the workflow is simpler could be misleading in practise as I found out in my research and development, partly due to my lack of basic Houdini knowledge. The system is quite complex and requires a different way of thinking compared to Maya.
The Houdini FEM simulation will have a use in my project however. I will use the knowledge I gained from my research
An alternative to the Ziva and Houdini FEM is Maya’s inbuilt soft body system, NParticles. It allows a certain amount of jiggle to be added to the body and the amount controlled with weight painting. As with Maya’s other built in simulation plugins there are many attributes to change.
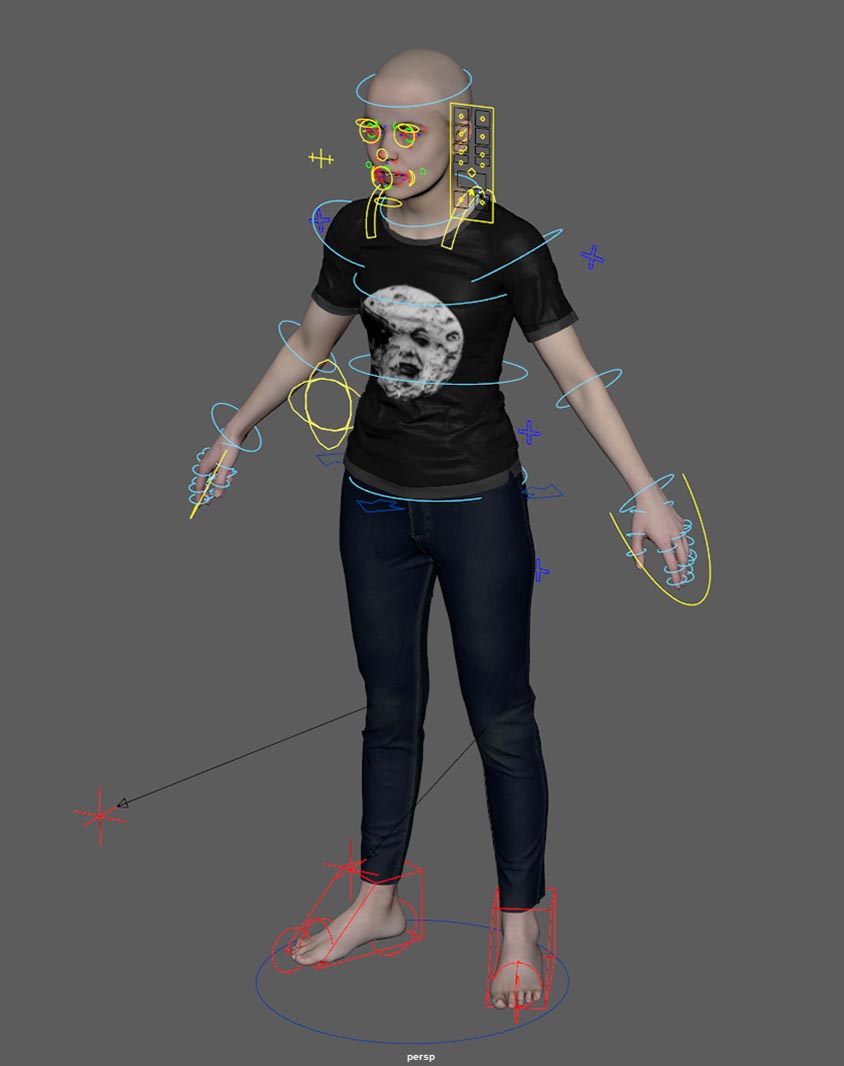
Rigging
I used Advanced Skeleton 5, which is set of scripts for Maya that automates the rigging proses of characters. It us used in the games industry as well as feature animations by studios like Disney Interactive and Ubisoft. One of the features I was excited to use was the face rigging and blend shape tools. I did extensive research into their manuals and their large collection of YouTube tutorials.
The main feature that drew me to use this toolset was the flexibility. It allows you to add and change the geometry and keep the skin weights with relative ease compared to traditional rigging.

First Cloth Test with Motion Capture.
The very first test animation using my pipe linethat I have developed. Its a proof of concept and thus has many errors and artefacts however it proves that my cloth pipe line works and with some minor tweaking it will be ready for production.
The body rig was created using Advanced Skeleton 5 in Maya and then motion capture data from the real Zoe was applied. The animated body was sent to Marvelous Designer as a cashed alembic file. A real denim jaceket was used to reverce engineer a pattern for Zoe's digital jacket.